ajax 익숙해지기
게시판 수정
글상세페이지의 글정보와 댓글목록 출력코드
function getReplyList() {
    console.log("getReplyList() 호출");

    console.log("boardNo : " + boardNo);

    $.ajax({
        type : "get",
        url : "replyList",
        data : {
            "bno" : boardNo
        },
        dataType : "json",  //result 에 담겨있는 형식
        async : false,    // 비동기  동기 설정
        success : function(result) {

        replyListPrint(result);

        }
        });
}

function replyListPrint(result){
    var loginMemberId = "${sessionScope.loginId}";

    var output = '<table border="1">';

    for ( var i in result) {

        if(result[i].restate == 0 &&  loginMemberId ==null ){
        output += '<tr><td colspan="3">'
        + '[비공개 댓글입니다.]</td>'
        + '</tr>';
    }
        else{
        output += '<tr>' + '<th>'
                + result[i].rewriter + '</th>'
                + '<td>' + result[i].redate
                + '</td>';
            if(result[i].rewriter == loginMemberId){
                output +='<td><button onclick="modifyReplyContent('+result[i].renum+')">수정</button>'
                +'<button onclick="deleteReply('+result[i].renum+","+${bView.bno }+')">삭제</button></td>';
            }

            output += '</tr>'
                + '<tr>' + '<td colspan="3" style="text-align: left;">'
                + result[i].recontents + '</td>'
                + '</tr>';
    }
    }
    output += '</table>';
    document.getElementById('replyList_ajax').innerHTML = output;

}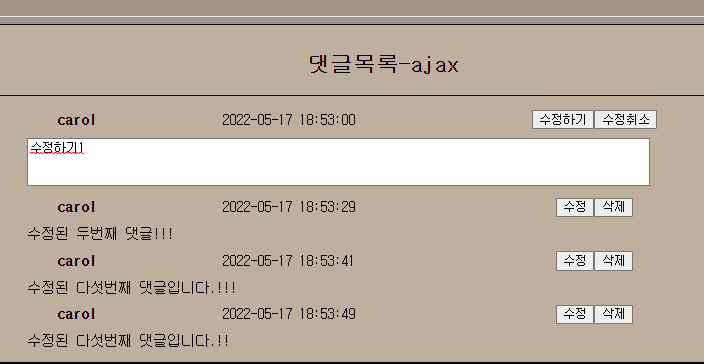
수정버튼을 클릭해서 이벤트가 발생했을 때 댓글번호를 매개값으로주고 이벤트핸들러를 실행한다.
이벤트핸들러 내용 -
ajax를 통해 글상세정보와 댓글목록 불러오고
반복문과 조건문을 통해 매개값(수정버튼을클릭한 댓글의번호)과 댓글들의 번호를 비교해서 일치하는 댓글만
'수정' --> '수정하기' '삭제' --> '수정취소' 로 버튼명을 수정하고
댓글내용은 <textarea>를 사용하여 이전댓글내용을 기본값으로 넣고 수정할 수 있게 한다.
function modifyReplyContent(renum){
console.log("modifyReplyContent() 호출");

console.log("boardNo : " + boardNo);

$.ajax({
    type : "get",
    url : "replyList",
    data : {
        "bno" : boardNo
    },
    dataType : "json",
    async : false,
    success : function(result) {

        var output = '<table border="1">';

        for ( var i in result) {

            if(result[i].restate == 0 &&  idCheck ==null ){
            output += '<tr><td colspan="3">'
            + '[비공개 댓글입니다.]</td>'
            + '</tr>';
        }
            else{
            output += '<tr>' + '<th>'
                    + result[i].rewriter + '</th>'
                    + '<td>' + result[i].redate
                    + '</td>';

                if(renum==result[i].renum){
                    output +='<td><button onclick="modifyReply('+result[i].renum+')">수정하기</button>'
                    +'<button onclick="modifycancel()">수정취소</button></td>';

                    output += '</tr>'
                        + '<tr>' + '<td colspan="3" style="text-align: left;">'
                        +'<textarea rows="3" cols="100" style="resize: none" id="recon">'
                        + result[i].recontents + '</textarea></td>'
                        + '</tr>';
                }
                else{
                    output +='<td><button onclick="modifyReplyContent('+result[i].renum+')">수정</button>'
                    +'<button onclick="deleteReply('+result[i].renum+","+${bView.bno }+')">삭제</button></td>';
                output += '</tr>'
                    + '<tr>' + '<td colspan="3" style="text-align: left;">'
                    + result[i].recontents + '</td>'
                    + '</tr>';
                }
                }
        }
        output += '</table>';
        document.getElementById('replyList_ajax').innerHTML = output;
    }
    });
}
내용을 수정하고 '수정하기' 버튼을 클릭해서 이벤트가 발생하면 수정을 위한 이벤트핸들러를 실행
①작성자일 때만 댓글수정이 완료되도록 작성자 정보,
②수정할 댓글 번호,
③수정한 댓글내용,
3가지를 ajax로 수정용 서블렛으로 보내서 DB에서 작업 후 결과를 받아서 성공하면
상세글내용과 댓글목록을 출력해서 보여준다.
function modifyReply(renum) {
		console.log("modifyReply 호출");
		var recontents = $("#recon").val();
		console.log(recontents);

		  		$.ajax({
				type : "get",
				url : "boardModifyReply",
				data : { "idCheck": idCheck,  "reno" : renum ,"recontents": recontents },

				success : function(result){

					if(result == "OK"){

						console.log(result);
					getReplyList();
					alert("수정되었습니다.");
					}
					else{
						console.log(result);
						alert("실패");
					}
				}

							})
                            }
글목록 정렬기능 - select option 사용
<select onchange="select_op()" id="selectId">
<option value = "BHITS">조회수</option>
<option value = "BNO">글번호</option>
<option value = "RECOUNT">댓글수</option>
</select>
$(document).ready(function(){
var checkSel = '${param.descSel }';
var checkSel2 = $("#selectId option");
for(var i =0 ; i<checkSel2.length; i++){
if(checkSel==checkSel2.eq(i).val()){
checkSel2.eq(i).prop("selected", "selected");
checkSel2.eq(i).prop("selected", true);
}
console.log($("#selectId option:eq(i)").val());
//값을 못찾는다 i가 문자열에 포함되어있어서 변수로 못읽음
console.log($("#selectId option:eq("+i+")").val());
// +를 사용하여 i를 문자열에서 분리 해서 변수로 인식하도록 작성
}
})
function select_op(){
var descSel = $("#selectId").val();
location.href = "boardList?descSel="+ descSel;
}
var descSel = $("#selectId").val();
//id 가 descId인 select의 데이터값(선택한 옵션의 value)
console.log("descSel : "+descSel);
var descSel2 = $("#selectId option");
//오브젝트형태
console.log("descSe2 : "+descSel2);
//배열형태라 단일 스트링출력으로는 출력안됨
console.log("descSe2 : "+descSel2.length);
//배열이므로 길이 확인가능 3
var descSel3 = $("#selectId option:eq(1)").val();
// 배열의 1번 인덱스의 값
//var descSel3 = $("#descId option:eq(1)") <---- 오브젝트형태로 console.log 출력안됨
var descSel10 =$("#selectId option").eq(1).val();
// id가 descId인 option의 1번인덱스 값
// id descId인 select문은 option이 3개있어서 길이가 3인배열형태
console.log("descSe10 : "+descSel10);
console.log("descSe3 : "+descSel3);
var descSel4 = $("#selectId option").val(); // 현재 선택되어있는 option의 value
console.log("descSe4 : "+descSel4);▶ <select> 태그에 id 속성 값을 onchange 이벤트가 발생 시
<select>태그에 담겨있는 value 를 파라메터로 갖는 url 로 이동하도록 이벤트핸들러를 작성한다.
location.href = "boardList?descSel="+ descSel;
▶ 현재 페이지(boardList)로 넘어올시 바로 실행되도록 코드를 하나 작성한다.
url로 넘어온 파라메터 값(선택한 셀렉트태그의의 옵션) 을 변수에 담아준다.
var checkSel = '${param.descSel }';
▶ <select> 태그의 옵션들을 변수에 담아준다. (object형태로 담긴다. 그래서 값을 그대로 사용할 수 없음.)
var checkSel2 = $("#selectId option");
▶ for문을 통해 checkSel2 변수를 인덱스별로 값을 구하도록 한다.
▶ checkSel2 은 현재 3(select태그의 옵션이 3개)개의 인덱스를 갖는 배열형식이므로 length로 checkSel2의 길이만큼 반복문 진행하도록 작성한다.
for(var i =0 ; i<checkSel2.length; i++)
▶반복문으로 나오는 값을 파라메터값을 저장한 변수와 비교한다.
if(checkSel==checkSel2.eq(i).val()) <----- .eq(i).val() i 번 인덱스의 값
▶조건식이 성립하면 그 옵션에 속성값을 부여해준다.
① checkSel2.eq(i).attr("selected", "selected");
② checkSel2.eq(i).attr("selected", true);
③ checkSel2.eq(i).add("selected", "selected");
④ checkSel2.eq(i).prop("selected", true);
속성을 추가할 수만 있으면 되기 때문에 4가지 모두 사용가능 (true, false 로 도 속성적용가능)
'국비지원' 카테고리의 다른 글
| 22/05/24 수업정리 (0) | 2022.05.24 |
|---|---|
| 스프링 다운받고 설정하기 (0) | 2022.05.20 |
| 22/05/12 수업정리 (0) | 2022.05.12 |
| 22/05/11 수업정리 (0) | 2022.05.11 |
| 22/05/10 수업정리 (0) | 2022.05.10 |